
Mick Reeves 1/6 Scale Spitfire - We can rebuild her!Following a serious crash caused by an engine fail immediately followed by a tip stall I have enough remaining from the wreckage to rebuild the Spitfire. Damage was rather extensive but the breaks were clean. The wing is in good shape unlike the fuselage which lost the front cowl. The elevator on one side also received a fracture which really needs new units building. So here we go with the rebuild! |
 |
 |
 |
 |
 |
 |
| 1. Click to enlarge | 2. Click to enlarge | 3. Click to enlarge | 4. Click to enlarge | 5. Click to enlarge | 6. Click to enlarge |
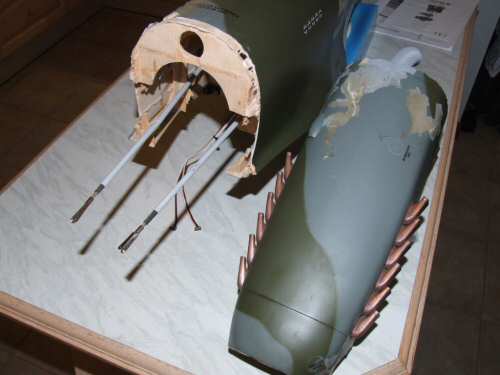
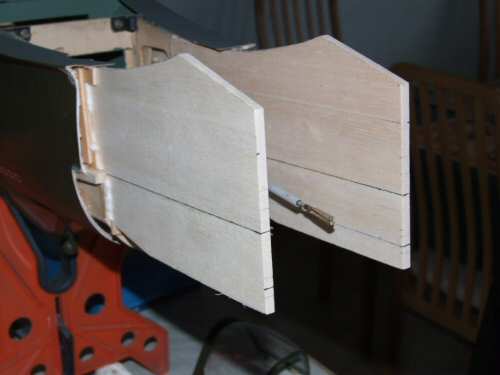
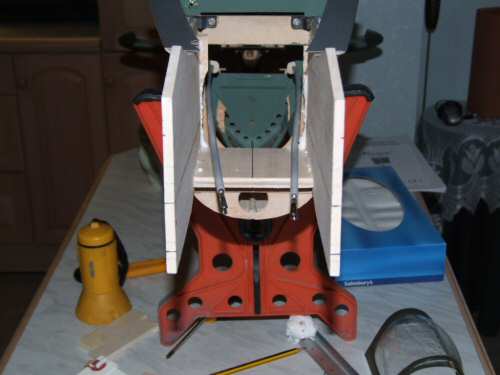
First up is the wing, Pic1, 2, & 3 show the main damage to the wing centre section and both cannons. The model hit the ground hard but coming out of a dive, consequently the cannons dug into the ground and were ripped out of the wing. The undercarriage is totally undamaged as was the Pitot head (amazingly). The wing also crushed into the fuselage pretty badly. Pic 4, 5, & 6. Show the damaged areas cleaned up to take the sheeting. Behind the cannons I have replaced the stays to hold them true. The centre section lost completely the mounting dowel which will need re-installing. |
 |
 |
 |
 |
 |
 |
| 1. Click to enlarge | 2. Click to enlarge | 3. Click to enlarge | 4. Click to enlarge | 5. Click to enlarge | 6. Click to enlarge |
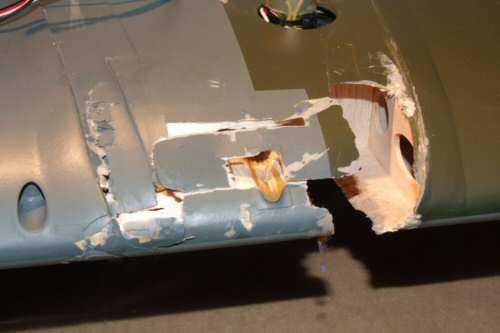
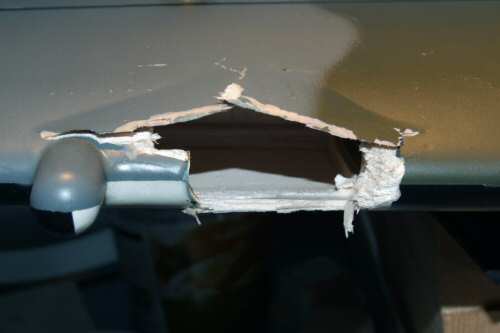
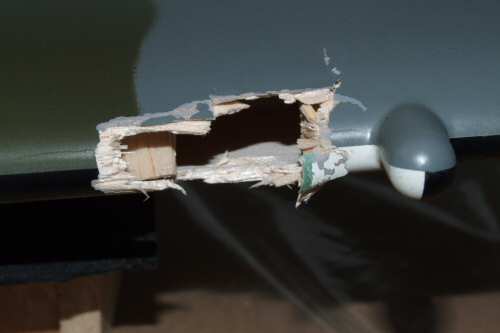
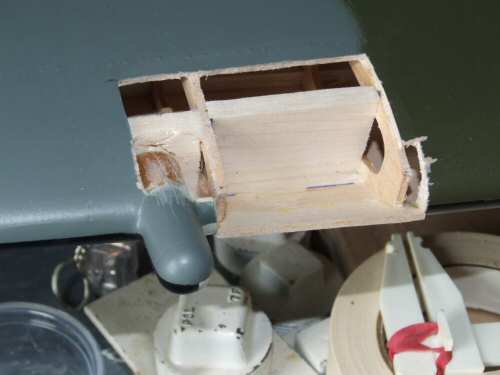
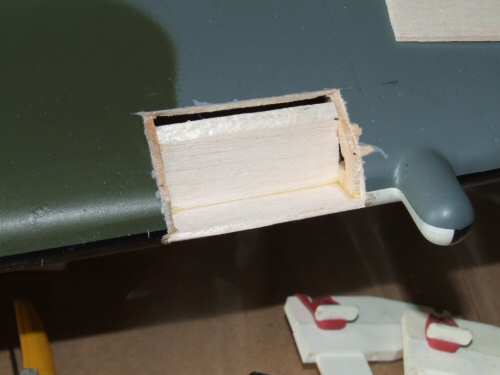
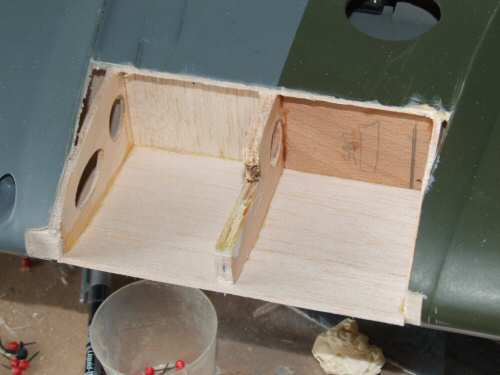
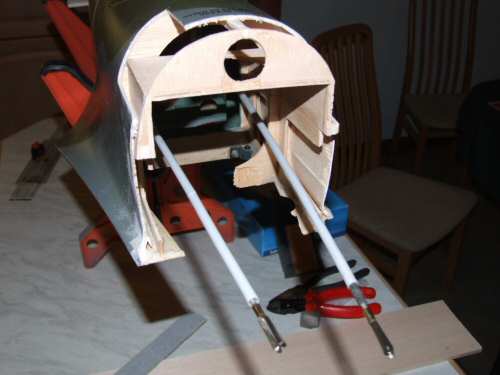
First job I have ordered a new glass cowl for the rebuild. Pic 1. The front cowl came off clean from the fuselage, but the glass was crumpled in the collision adsorbing most of the impact. The control rods are surprisingly undamaged and can be re-used. Pic 2. Down the fuse there is some cosmetic damage that needs attention later, but for now the major work is at the front. Pic 3. The front end was cleaned up and the task of working out how to graft the new front end began. After some consideration I decided to re-build similar to the style used by Brian Taylor for his Spitfire. I will make a box section from 1/4" balsa grafted onto the inside of the remaining light ply front section. The firewall will be 25mm shorter to permit installation of a bigger glass filled engine mount which will be mounted on shock adsorbing mounts which have yet to be tested! moving the mounts back also gives more space for the exhaust. Pic 4. Rebuilding the box I have cut from 1/4" balsa replacement sides traced from the plans, and grafted them to the inside of the original light ply frame to the next former F5. The sheeting to the top of the model (bottom in picture) is deliberately oversized so I can trim it to exact size for the glass cowl when it arrives. Pic 5. From the front a sheet of 1/4" balsa lines the top section part way and I will graft onto the front of this some ply which will hold the servo tray. Throttle, Rudder, and elevator servos will be the tray this time, the throttle servo will operate through the firewall via a bell crank in the engine compartment. Pic 6. Shows the servo tray in and 1/4" ply firewall epoxied into position. |
This rebuild has been halted while I get my business establised.
It will continue, but I currently do not know when!