
Mick Reeves 1/6 Scale Spitfire Review
|
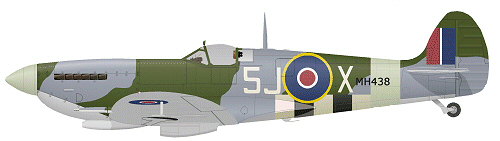
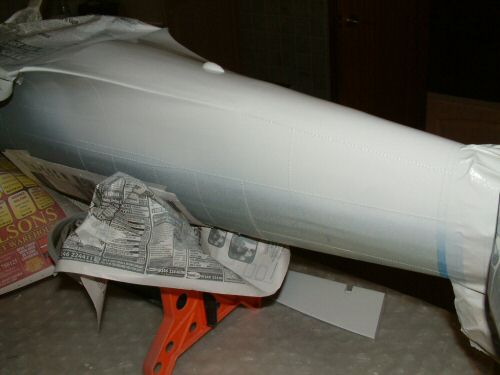
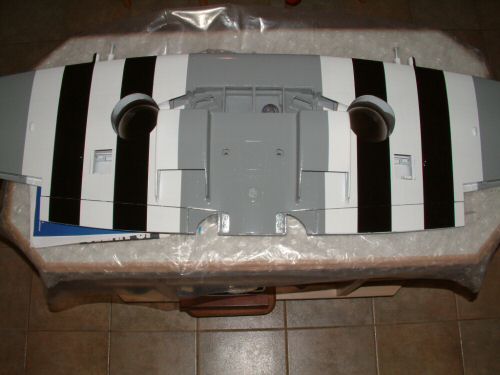
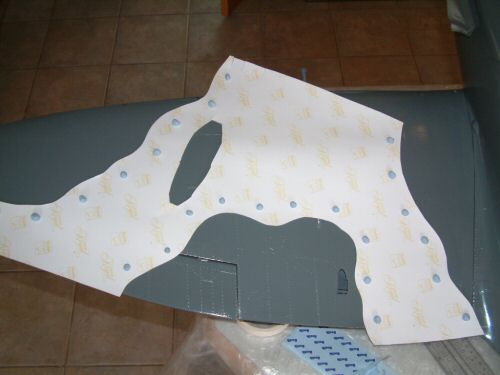
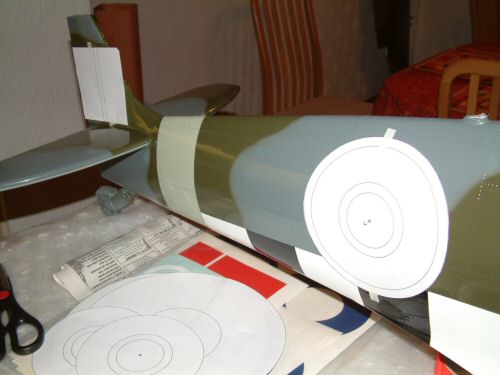
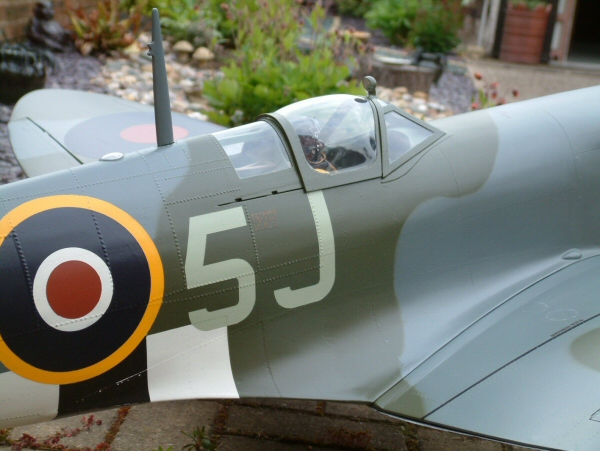
The sequence of paint application is very straight forward as long as 2 basic rules are followed. First it is desirable not to tape the same line twice, as this will result in poor alignment and most likely rough edges. Second the order of application of colour is to apply dark over light rather than light over dark. There are difficulties following these rules all the time, but deviation from these rules should be kept to a minimum. The paint scheme for the Spit is absolutely standard for a summer 1944 machine. I am going to introduce full width lower wing and 1/3 fuselage invasion stripes at 3" width (full size were 18"). The pattern below is the closest reproduction I can find. In the example the lower fuselage stripes are shown narrower than full width stripes which would go from just level with the radio mast and end at the Sky stripe.
|
 |
 |
 |
 |
 |
 |
| 1. Click to enlarge | 2. Click to enlarge | 3. Click to enlarge | 4. Click to enlarge | 5. Click to enlarge | 6. Click to enlarge |
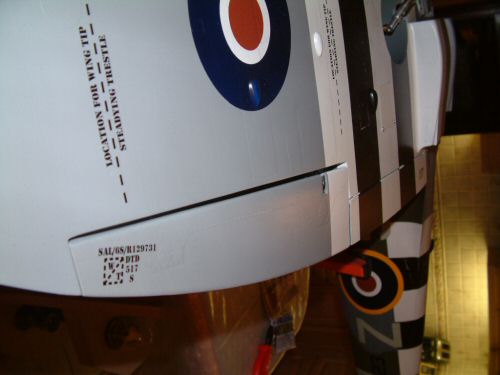
| Pic 1 . Getting started with the Sky "S" stripe at the rear of the fuselage. This picture is the first of 2 light coats. There is no masking here as there are no "final edges" yet. Pic 3. While the Sky was in use the spinners are given 2 coats. Pic 4. Invasion stripes start with a white base coat. The front of the Sky band is masked all the way round the fuse before commencing. This is the only final edge here so no more masking at this stage. Pic 5 & 6. The wing, aileron, wheel covers, landing flaps, and small servo hatches all receive the same whitening experience! |
 |
 |
 |
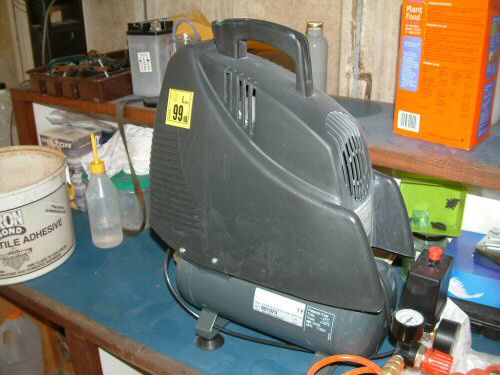
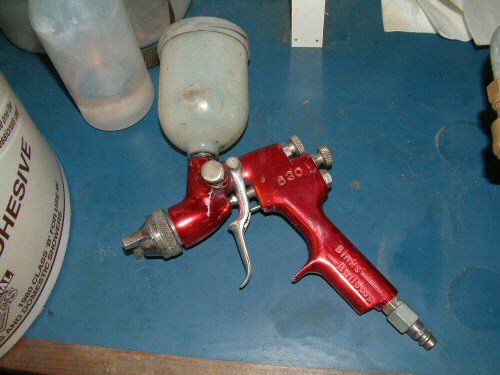
| How about this. I have got a small 1.5 HP compressor for my birthday. It has a 6 ltr. bottle which means a massive spray gun can't be used, but it's time to think again about the spraying. In discussion with Colorite I have got the main colours, white, both grey's, and dark green in 500ml tins. I practiced with the white for the second coat using a small Binks Bullows 630 gravity pot spray gun. Some thinners were needed to get the desired results (about 8% vol/vol Xylene / White Spirits blend). With the gun at 40psi (flowing) I found that 6 - 10 passes were the limit before the compressor had to recover. I am much happier with this arrangement and will continue to use the spray gun. Top tip. buy a compressor & gravity pot arrangement with loose paint. Initial cost is higher, but after the second model you will be in front on cost. I would recommend 20 -25 Ltr bottle if you want to do anything big! |
 |
 |
 |
 |
 |
 |
| 1. Click to enlarge | 2. Click to enlarge | 3. Click to enlarge | 4. Click to enlarge | 5. Click to enlarge | 6. Click to enlarge |
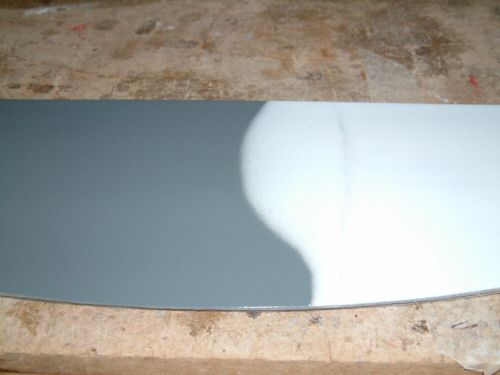
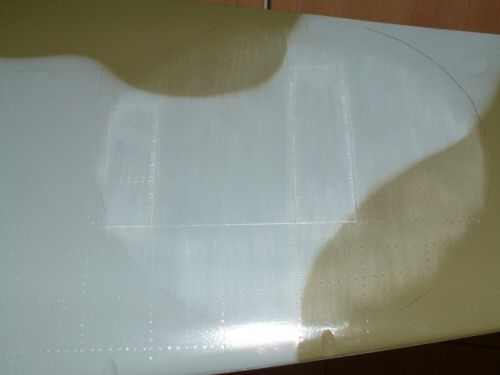
| Moving onto the Medium Sea Grey there are 2 stages for this colour, first the fuse & wing underside will be painted, then in a second stage the aileron, landing flaps (inner and outer), radiator slats, and retract cover plate Pic 1 . Shows the fuselage with the Sky "S" band and the invasion stripes fully masked. For all masking I am trying DUCK 14 day masking tape.The first light coat has been applied. Pic 2. The wing has the invasion stripe area masked pictured also with the first coat applied. Pic 3. After the light second coat had been on 30 minutes I removed the masking tape to reveal the finish. The 14 day Duck tape has done a really good job with no bleed along the edges. Pic 4. Time for the Ocean Grey to be applied to the fuselage. Additional masking has been added to protect the Medium Sea Grey underside. Pic 5. shows a sheet of card raised from the surface with a pad, sprayed from directly above with no inflection in the wrist. The blend is relatively sharp. I will thin the paint a little more to get a finer mist in the next experiment. |
 |
 |
 |
 |
 |
 |
| 1. Click to enlarge | 2. Click to enlarge | 3. Click to enlarge | 4. Click to enlarge | 5. Click to enlarge | 6. Click to enlarge |
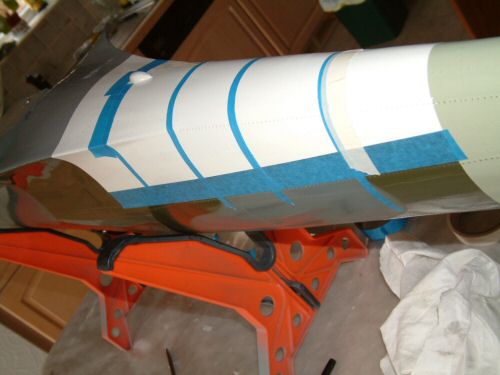
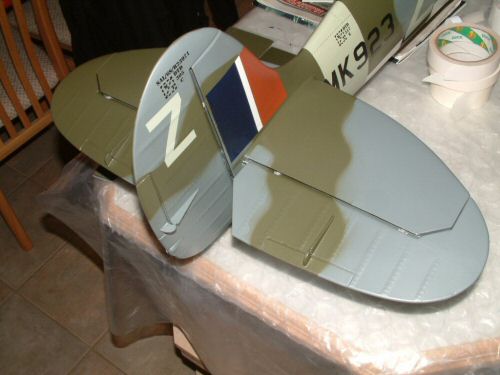
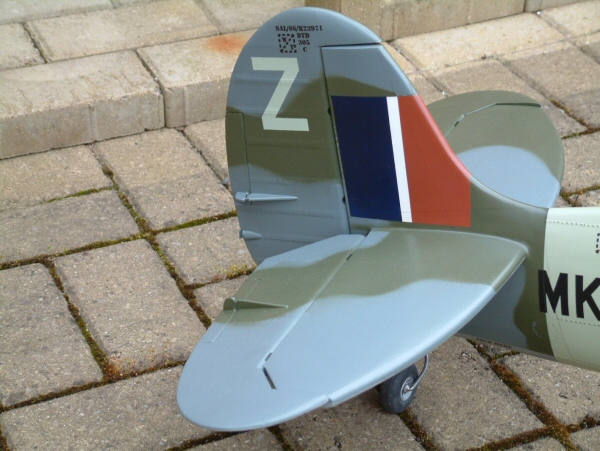
| Pic 1. Invasion stripes are now going on the underside of the wing marked at 3" intervals. Pic 2. At the same time the display prop is given the same treatment. Pic 3. The rudder and elevators have received 2 coats of Medium Sea Grey on all sides prior to the top sides getting the Ocean Grey treatment. The stitching looks OK but not as convincing as I would have hoped. Pic 4. Masking tape removed before paint dries so that errant over spray can be easily removed with White Spirits. Pic 5. When the stripes had dried Ocean Grey was applied on the wing top (shown), ailerons and elevator top and rudder sides. Pic 6. Preparing for the dark green cameo I outlined in water based ink the approximate positions of the boundaries. |
 |
 |
 |
 |
 |
 |
| 1. Click to enlarge | 2. Click to enlarge | 3. Click to enlarge | 4. Click to enlarge | 5. Click to enlarge | 6. Click to enlarge |
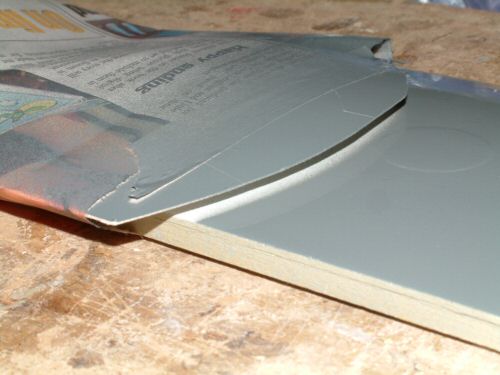
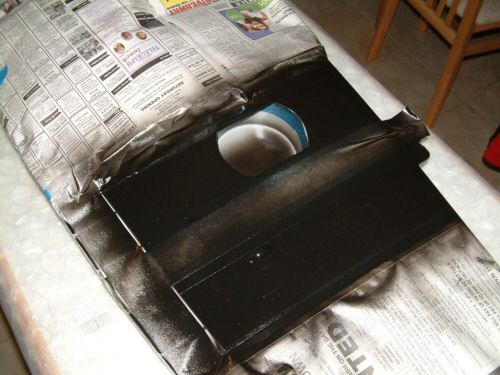
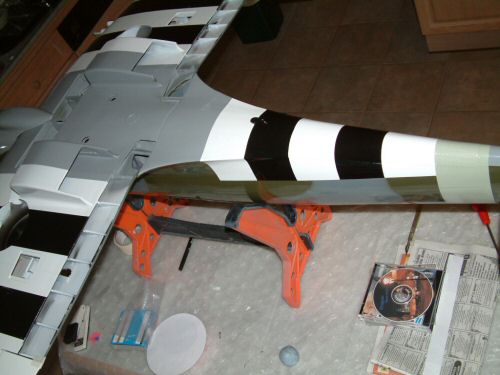
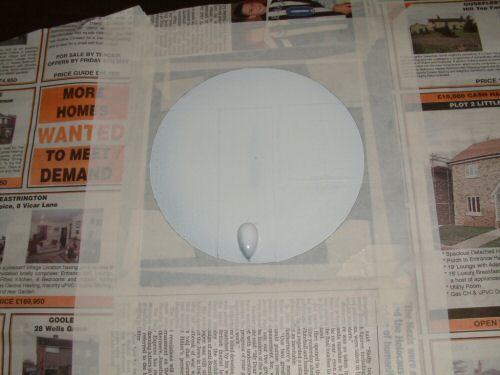
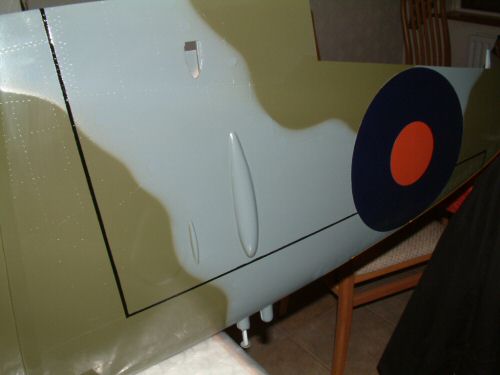
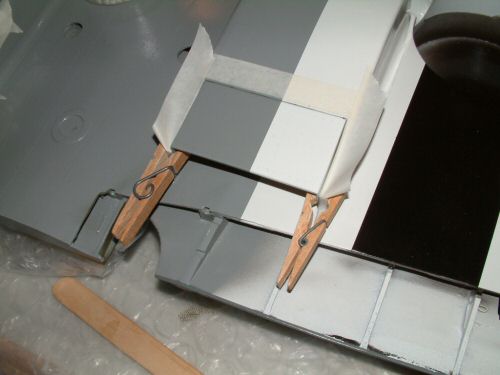
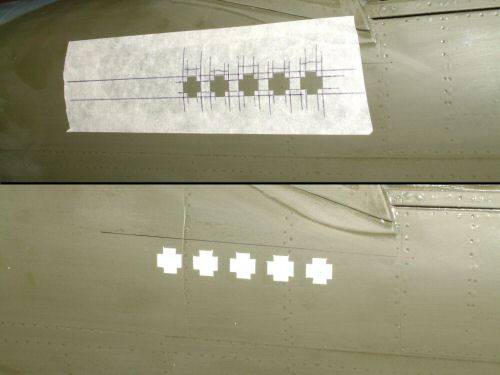
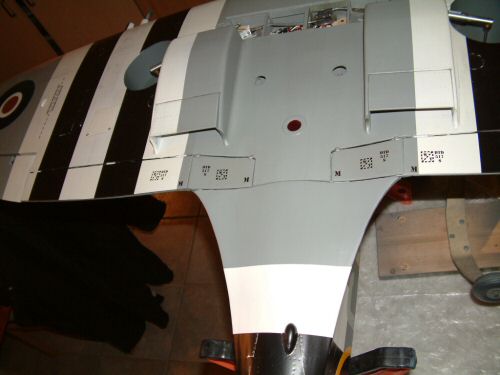
Pic 1. The areas to remain grey were covered by stiff paper held into position with small balls of Blue Tack that held the paper just off the surface. Unfortunately I forgot to show the sections covered ready for or just painted - I was on a tight schedule and just forgot all about it. The wing and fuse were sprayed separately (because I was short of Blue Tack) and shortly after painting the masks were removed. Some very light over spray highlighted the position of the Blue tack but will disappear when the surface is treated later. Pic 2. Now all of the main painting is finished all remaining masking tape can be removed from the fuselage and underside of the wing. Application of the fuselage black invasion stripes was prepared and. . . Pic 3. shows the end result. Pic 5. I have been encouraged by a number of people to paint the roundels rather than using stickers, so I decided to have a go. I begin the process by marking out centres of the large "C1" style fuselage roundel with a paper template. The centre was marked onto masking tape under the paper outline. Pic 6. On the wing I have had a practice at weathering the surface a little where the roundel will go. Using some "000" wire wool which has been cleaned in spirit before use I washed up and down parallel to the chord of the wing. This process also removes the blob marks left by the Blue Tack that held the paper mask in position while painting the Dark Green cameo. It does look a little more severe than it looks in the picture. I will use this technique all over the airframe after all the roundels are finished. |
 |
 |
 |
 |
 |
 |
| 1. Click to enlarge | 2. Click to enlarge | 3. Click to enlarge | 4. Click to enlarge | 5. Click to enlarge | 6. Click to enlarge |
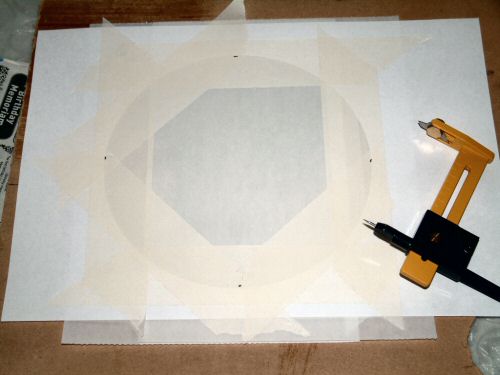
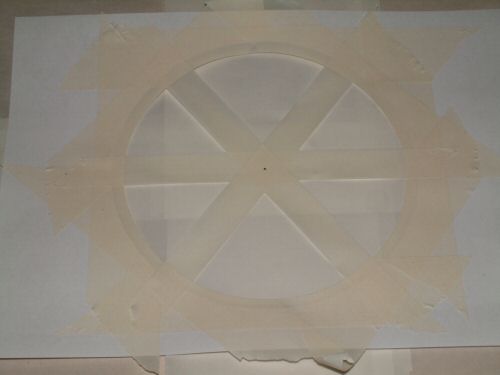
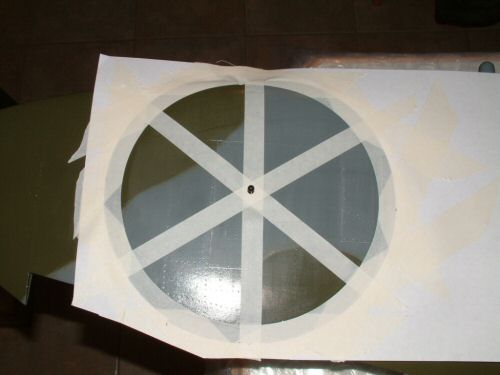
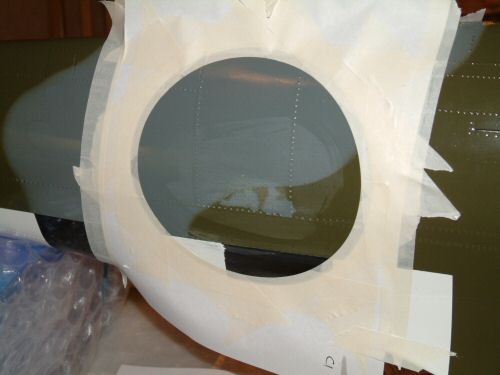
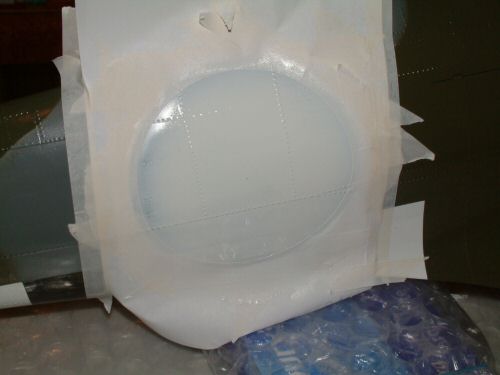
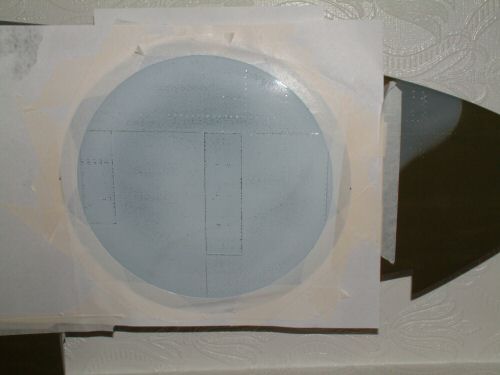
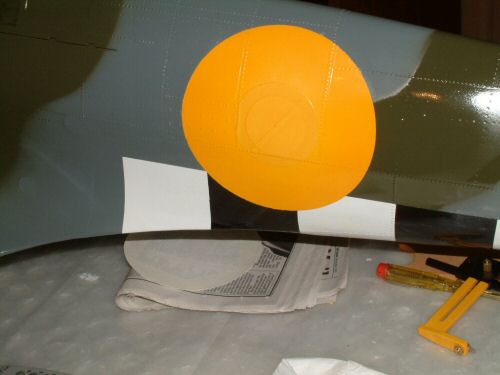
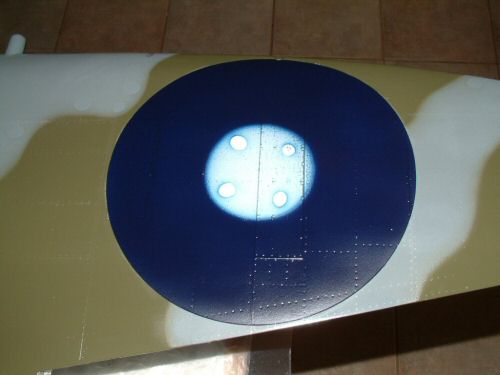
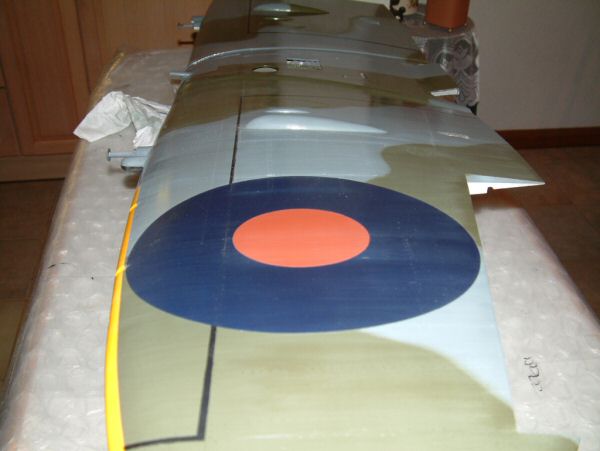
| The roundels will be painted building up the various colour layers one by one. The secret will be to follow the basic rules mentioned at the beginning by masking any edge once only and going from light to dark colours. First job will be to make the exact outer radius for all roundels. Pic 1. Using the Radius Cutter on a sheet of paper a radius is cut with a diameter 12mm greater than required. Medium tack masking tape is then lined inside the radius before cutting again with the radius cutter to the exact diameter required. The scrap is removed before . . . Pic 2. The application of cross sections of tape are applied to mark the centre, and to hold the circular shape of the mask. All this work is conducted on top of silicone paper to prevent it sticking. Pic 3. Once sighted the mask can be applied to the surface of the model guided to the centre with a pin. The silicone paper is slowly withdrawn and the mask progressively rubbed down. Once satisfied the cross section parts can be removed Pic 4. Before painting the colours a swab with a clear polyurethane lacquer is wiped onto the edge of the mask to seal any small gaps. This prevents (hopefully) bleed of the colour onto the cameo under the mask. Pic 5. "C1" roundel on the fuselage side receives a centrally weighted coat of white paint, as too do the "C" under wing and the Fin Flash. Pic 6. I have also painted a light coat of white over the upper wing "B" roundel even though it has no white. This provides an even base coat for the blue and red colours of the other roundels and flash. |
 |
 |
 |
 |
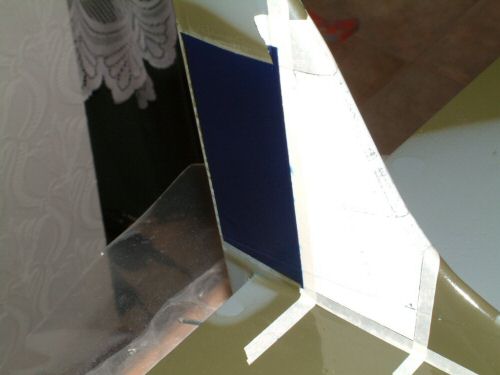
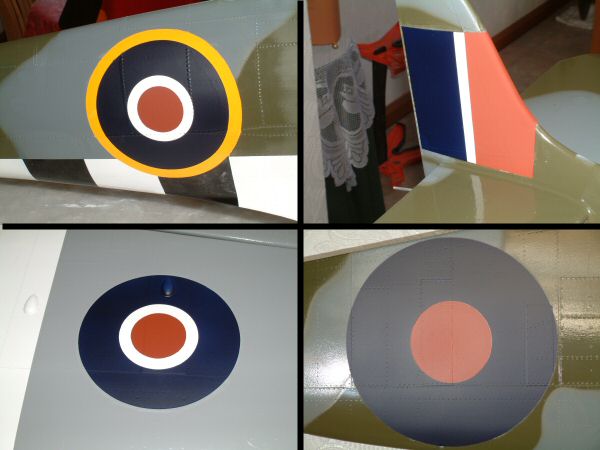
| "B" Upper wing | "C" Lower wing | "C1" Fuselage sides | Fin Flash |
|
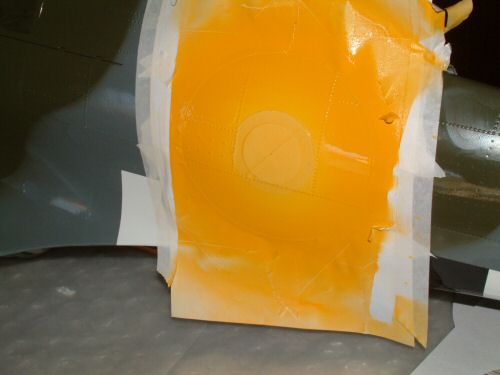
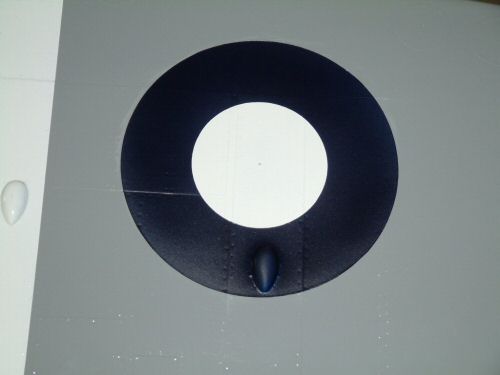
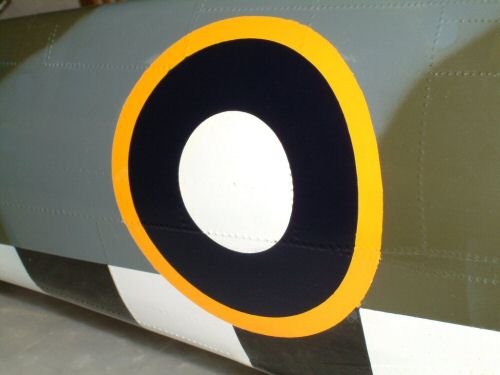
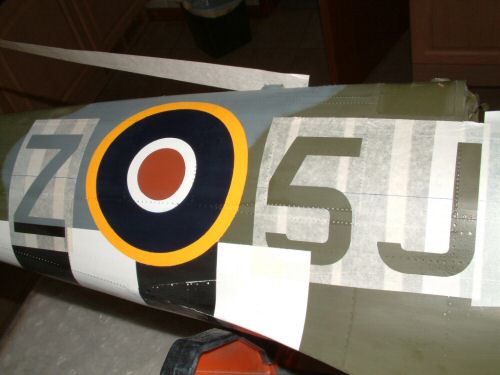
Pic 1. The "C1" roundel on the fuselage is the only one with the insignia yellow border. The centre section was masked to the outside diameter(OD) of the white circle before applying the colour. This protects the white inner circle for this colour and the insignia blue to be applied next. Pic 3 & 4. show the tail flash and the under wing re-masked after the modified work part prepared for the insignia blue. The top roundels were prepared in a similar way. Pic 5. & 6. Shows the results after 2 even coats of the insignia blue with all masks removed. |
 |
 |
 |
 |
 |
 |
| 1. Click to enlarge | 2. Click to enlarge | 3. Click to enlarge | 4. Click to enlarge | 5. Click to enlarge | 6. Click to enlarge |
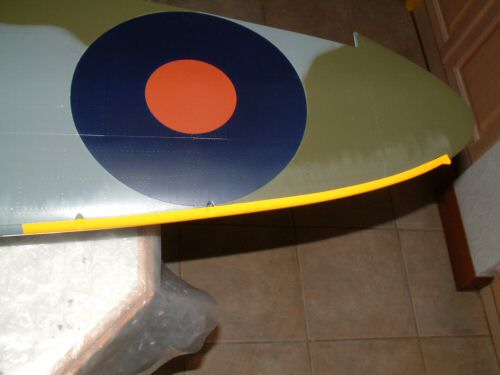
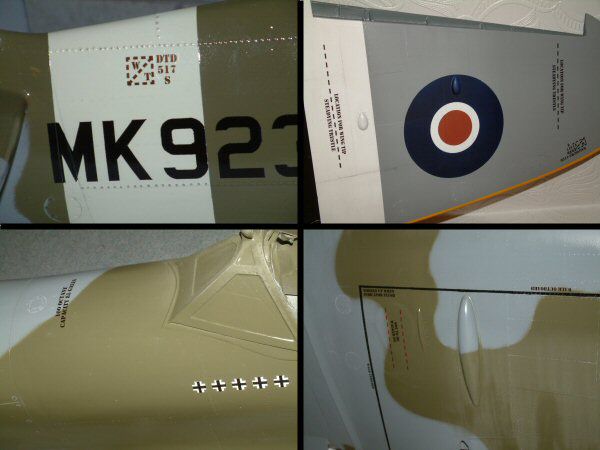
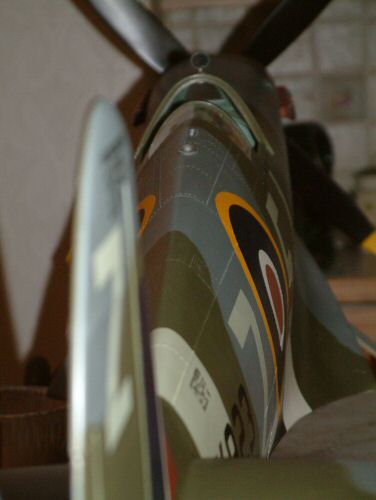
Pic 1.The fuselage roundel is a little disappointing with a few smudges, but considering the problems I had here, I should be grateful! I will try and clean these edges up later as best I can. Pic 2. Next the insignia red is the final colour to be applied. The fin shown in the picture is part prepared for this process. Pic 3. After application the final result is relatively pleasing, although I will adopt a totally different procedure next time. Pic 4. The yellow strip on the leading edge was applied next. I have seen so many variations on the position and width of this stripe that I really did not know what to do. Finally I decided to used the reference information in the SAM publications book and a little artistic licence! Pic 5. The walkway boundary line was painted on using masking tape and paintbrush. Pic 6. Radiator vents were finally glued into position. |
 |
 |
 |
 |
 |
 |
| 1. Click to enlarge | 2. Click to enlarge | 3. Click to enlarge | 4. Click to enlarge | 5. Click to enlarge | 6. Click to enlarge |
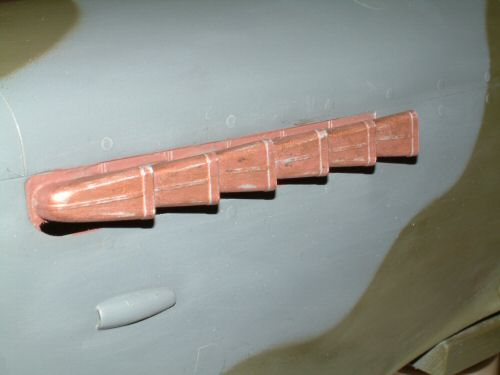
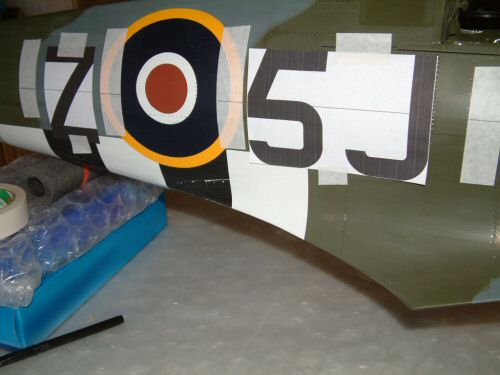
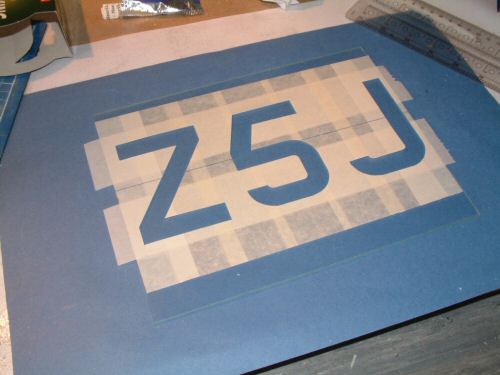
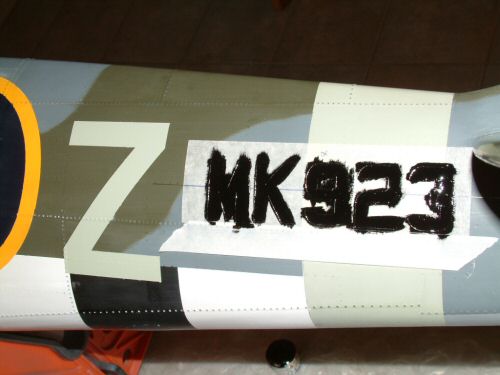
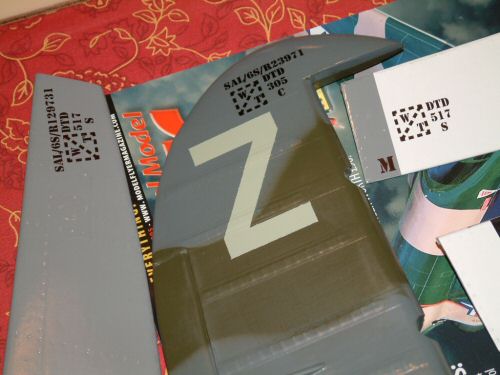
Pic 1. The exhaust stacks were painted with Humbrol Metallic Aluminium (56), followed by Matt Rust (113), and finally a few dabs of Matt Black (33) here and there. The stacks were allowed to dry thoroughly before rubbing with "000" wire wool which was lightly saturated with Metallic Bronze (55). This gave a little "sheen" to the surface as the silver was exposed under the rust colour. I might smudge a little soot into the shadows of the stacks, but for now they are finished. The whole fuselage was rubbed down with "000" wire wool to flatten the colour and help to highlight the panel lines and rivets. Pic 2. Squadron marking are in 126 Squadron for Summer 1944. The paper cutouts were used to set the spacing and alignment for the stencils. A reference line was drawn onto surrounding masking tape. Pic 3. The stencils were prepared on a sheet of glass, which permits easy cutting, clean lines and curves. On the glass I first lay some silicone paper retained with double sided tape, then overlapped Duck masking tape, and finally the characters printed on paper. The shapes are carefully cut out with a new scalpel and the paper removed. This is the situation seen in pic 3. To lift the stencil off the cutting surface masking tape is applied over the entire stencil and lifted from the silicone paper. It can now be transferred to the model (Pic 4) aligning them with the previously made reference lines. Once satisfied the top mask is removed carefully revealing the stencil. Three even coats of Sky "S" were applied before removing the stencil. Pic 5. Similarly the serial number was produced and applied. Rather than spraying I used Humbrol Gloss Black (22) liberally brush applied. Pic 6. For my first attempt at stenciling I think I have done OK. one tip - replace the blade regularly! |
 |
 |
 |
 |
 |
 |
| 1. Click to enlarge | 2. Click to enlarge | 3. Click to enlarge | 4. Click to enlarge | 5. Click to enlarge | 6. Click to enlarge |
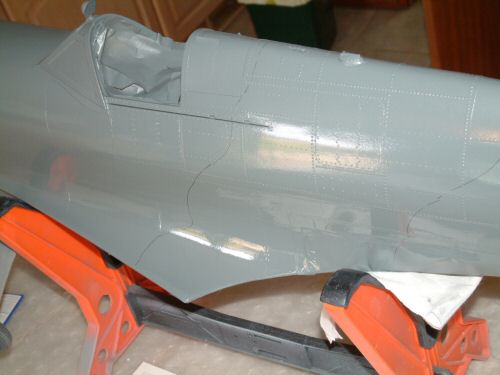
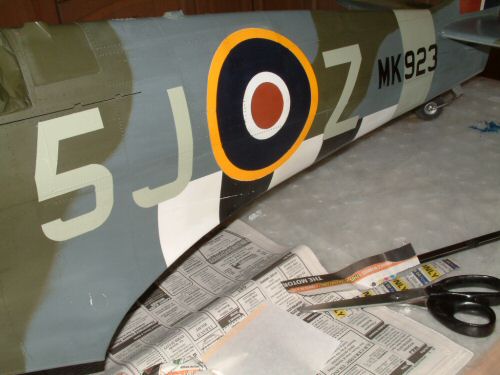
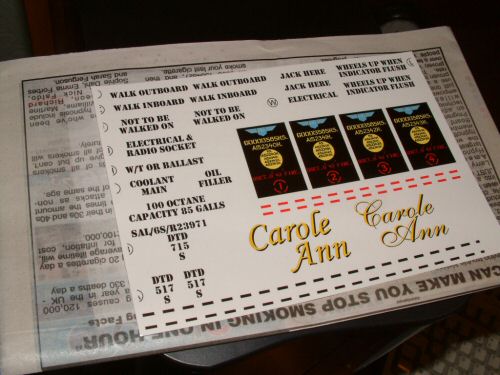
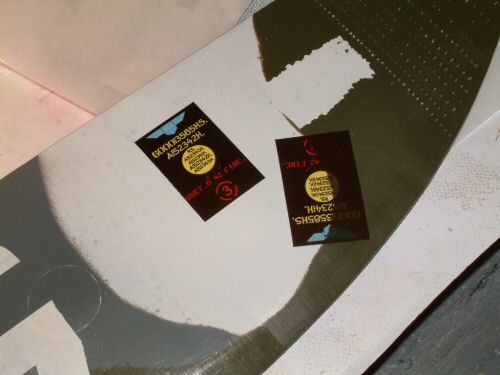
Pic 1. After running over all surfaces with "000" wire wool parallel to the chord the panel details stand out that little bit better. Not so clear on the photo but it is nice. Pic 2. Planning on having 5 kills on the side so the white background for the insignia were prepared to receive the water slide decals. Pic 3. Areas to receive decals were planned and mapped out on drawings before spraying a very thin coat of clear gloss polyurethane in relevant areas to improve adhesion. Note also I have also added to the rudder the aircraft letter which was a common procedure at that time for 126 squadron. Pic 4. Water slide decals were prepared using Microsoft PowerPoint and printer at the highest print resolution on my inkjet printer (2880dpi) Photo taken after a few light coats of clear crystal clear acrylic lacquer. All information for text was taken from a selection of text books that I have in my collection. There are no fixed rules but I tended to reference older machines in museums that have received little restoration in preference to newer machines that have been "modernised". Pic 5. Having not used water slide decals before I was a little apprehensive about using them. I tried the prop labels on the test panel and discovered that they really do not work on a dark background. In the picture one label is spanning the dark green and white. Clear demarcation is visible fir the soft colours on the darker side (bit of a Star Wars link there!). You will have seen in pic 4 the "Carole Ann" yellow and black writing. I was going to add that to the fuselage side but it will not work for the same reasons. That will require a rethink. (Carole Ann is my wife's name). Pic 6. Black text seems to work OK and has been deployed accordingly. |
 |
 |
 |
 |
 |
 |
| 1. Click to enlarge | 2. Click to enlarge | 3. Click to enlarge | 4. Click to enlarge | 5. Click to enlarge | 6. Click to enlarge |
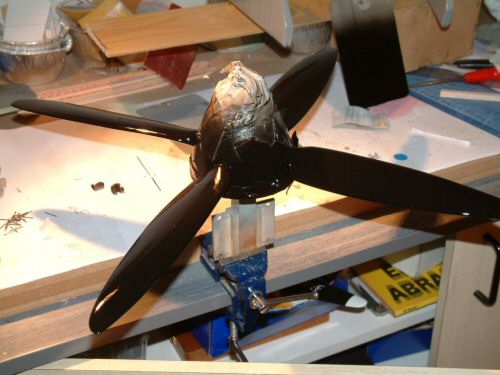
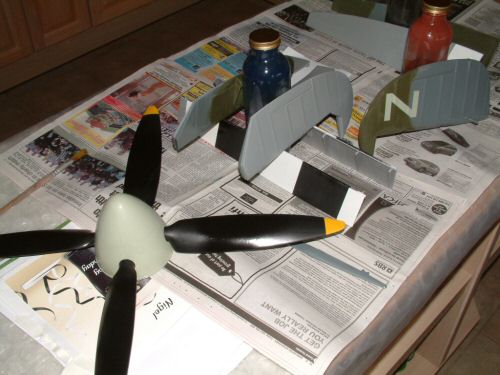
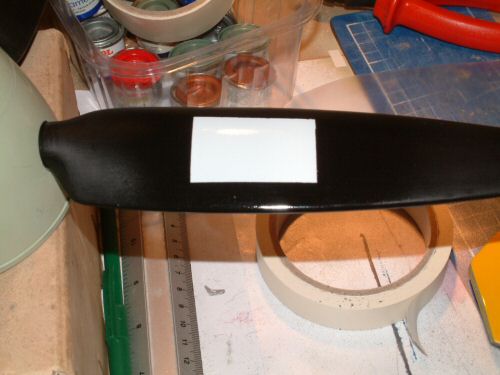
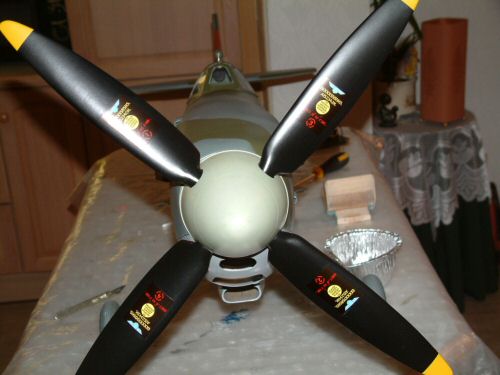
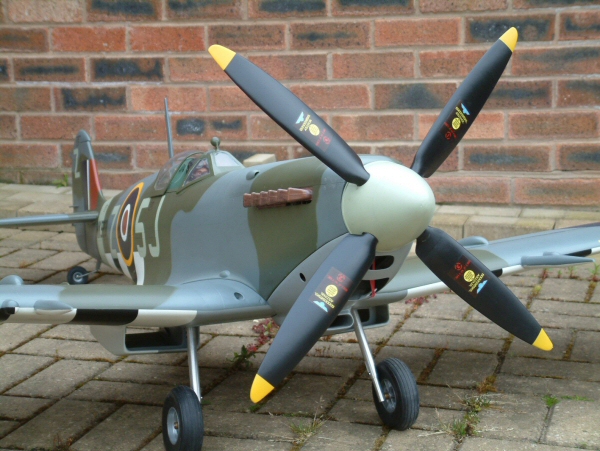
Pic 1. For the prop decals the best solution would be white water slide decals. With none in my stocks I decided to simply spray a small white square just in the shadow of the decals to give the contrast for the lighter colours.ic 2. A selection of the other decals in position. Pic 3. With the white paint as a background the Rotol Badges look a little more like it. This will look much better when I get a coat of satin polyurethane over the entire prop. Pic 4. Satin polyurethane applied all over she is starting to look much better. The prop is certainly pleasing, just wish she could fly with it !! Pic 5. Random shot I took from the tail end. Think it looked good enough to post. Next up is assembly of the moving parts. Pic 6. Not exactly painting but the front hole for the motor was properly rounded off and additional holes drilled in and around the inner circumference to permit some extra opportunities for ventilation. I also glassed in and around the engine bay to seal the compartment properly. |
 |
 |
 |
 |
 |
 |
| 1. Click to enlarge | 2. Click to enlarge | 3. Click to enlarge | 4. Click to enlarge | 5. Click to enlarge | 6. Click to enlarge |
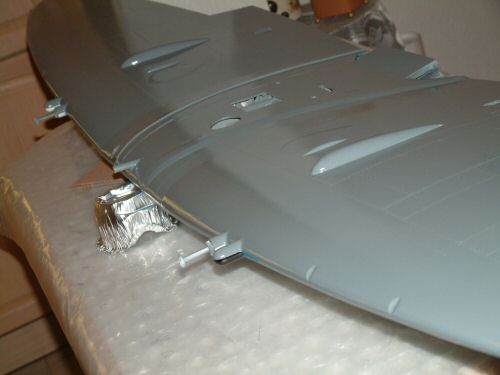
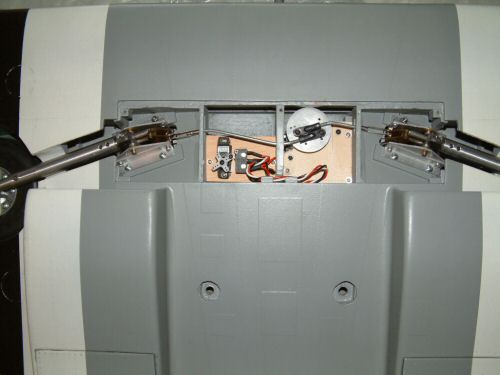
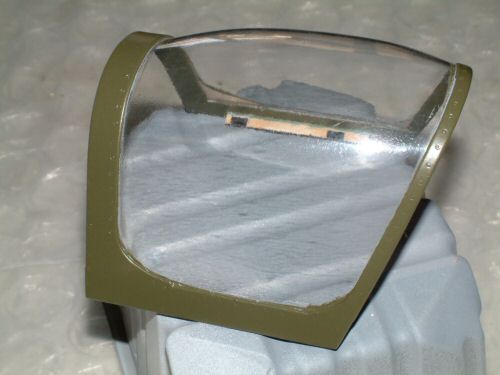
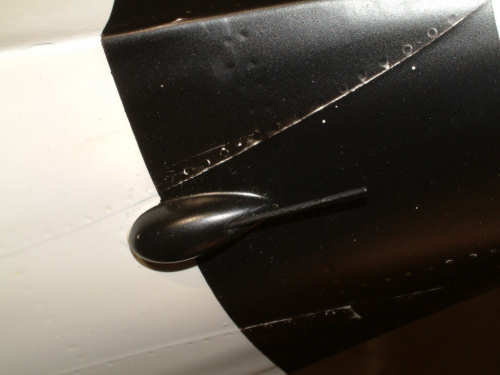
Pic 1. The Tail surfaces were installed using the Robart pin hinges. No major problems encountered with this work. Only the rudder lamp needs installing at a later date. Pic 2. Getting into some final assembly with the retract system fitting into position. Tested the system out and everything worked fine however, while balancing a battery on top of the wing for the test the battery slipped off and hit a hard tiled floor. Not wanting to risk it that battery will never fly! So I will be in the model shop this weekend (again). Pic 3. The canopy has been riveted with the soldering iron as the wing and then sprayed with Dark Green and a final satin polyurethane coat. Pic 4 & 5. Installation of the aileron and landing flaps went OK. I am always very cautious with this part of the assembly, getting the right amount of glue to hold the hinges, but not too much that the hinges are fouled. Time now to install the remaining servos and connections in the wing. Pic 6. the Boat antenna was completed with a short length of push rod wire and painted black. |
 |
 |
 |
 |
 |
 |
| 1. Click to enlarge | 2. Click to enlarge | 3. Click to enlarge | 4. Click to enlarge | 5. Click to enlarge | 6. Click to enlarge |
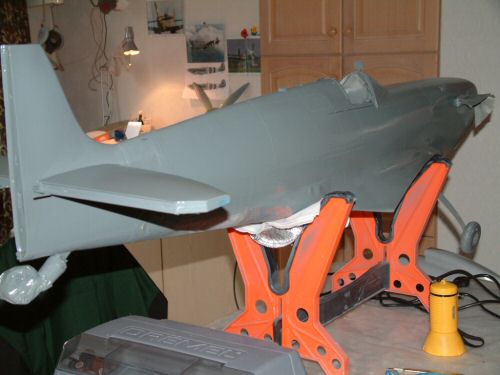
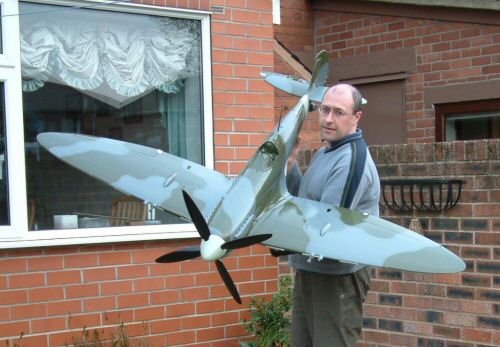
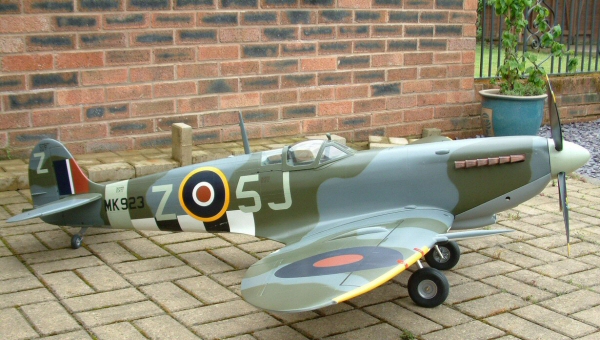
| OK so it's summer, I have a motorcycle that demands riding, models that need crashing (2 this year) and there isn't much time for the Spitfire building. A few folks have requested more pictures, so here are a few for now. |