
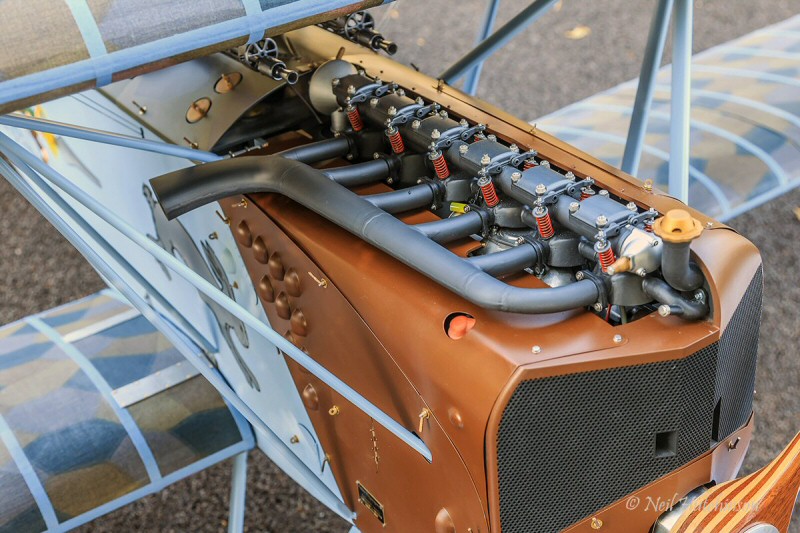
MY MERCEDES D.III DUMMY ENGINE 1/3 scale |
For you all!I have received a number of requests from people wanting me to supply the dummy engine parts I drew up for my GTM D.VII. I was going to sell them commercially but I really do not have time spare to add that workload to my business. I have decided to share these files freely for individual use. Not for people to use for profit naturally, that would not be fair would it!
So without any further waffle here are the parts for download. Please read the comments very carefully as you may need to modify the files for your own use! I used good old Sketchup for these drawings.
These parts will need to be printed in Nylon using SLS. You can try other systems if you wish! There are many companies worldwide offering this service.
|
 |
Please show your appreciation.Those who want to show some appreciation of the hours of work these files will save you I am not averse to a donation towards my retirement fund.
Thank you to those who donate!.
|
 |
Download all files.
You can download all files on this link |
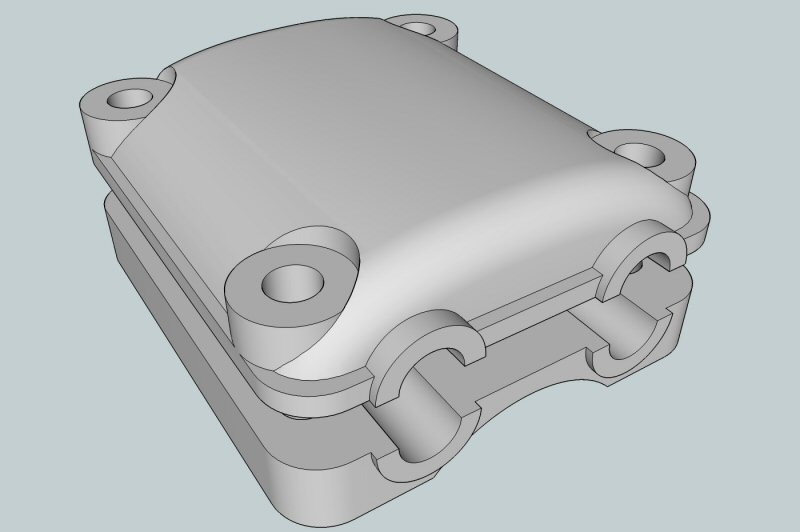 |
Rocker covers Mercedes ( 6 sets required)The Mercedes engine rocker covers are designed to mount on the aluminium tube supplied with the GTM dummy engine kit. The tube is 19mm diameter.
On my engine the engine cylinders were separated 60mm apart.
You may want to alter these proportions for your model.
For best results print the parts as set out in the STL files for minimum "peel" effect.
|
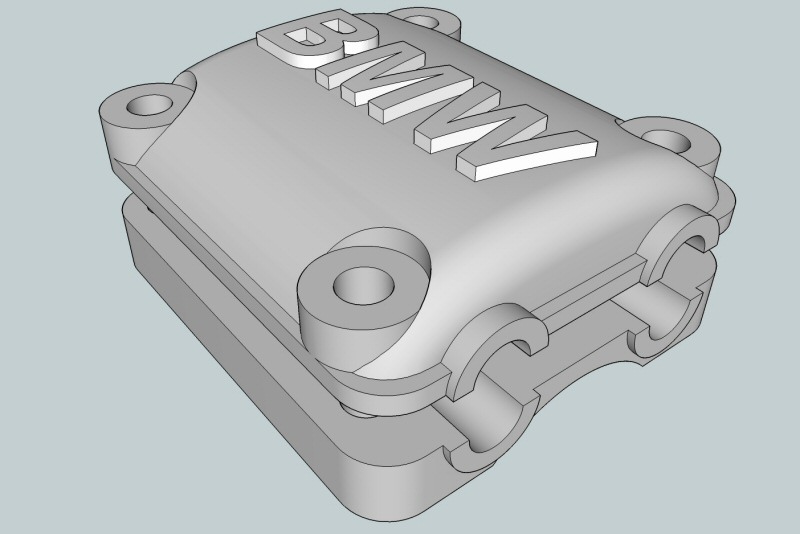 |
Rocker covers BMW ( 6 sets required)The BMW engine rocker covers are designed to mount on the aluminium tube supplied with the GTM dummy engine kit. The tube is 19mm diameter.
On my engine the engine cylinders were separated 60mm apart.
You may want to alter these proportions for your model.
For best results print the parts as set out in the STL files for minimum "peel" effect.
|
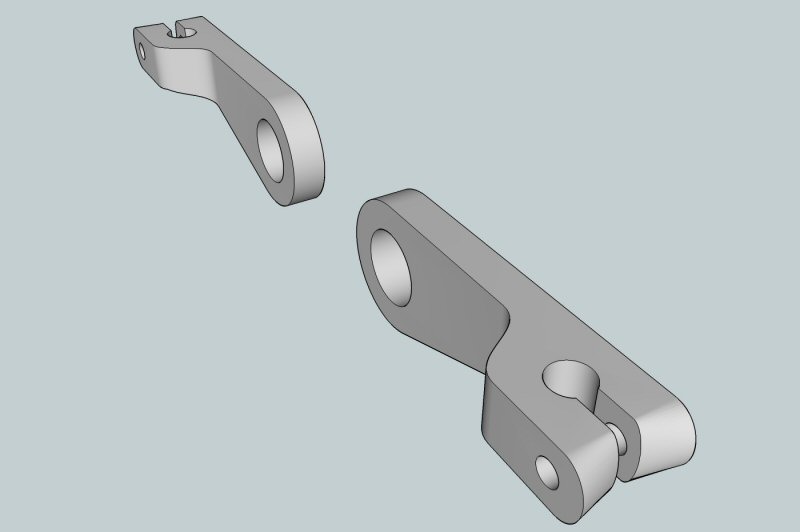 |
Rocker Arms ( 6 sets required)The rocker arms are designed to mount on 4mm brass tube and then glued into the rocker housing when everything has been assembled.
You may want to alter these proportions for your model.
For best results print the parts as set out in the STL files for minimum "peel" effect.
|
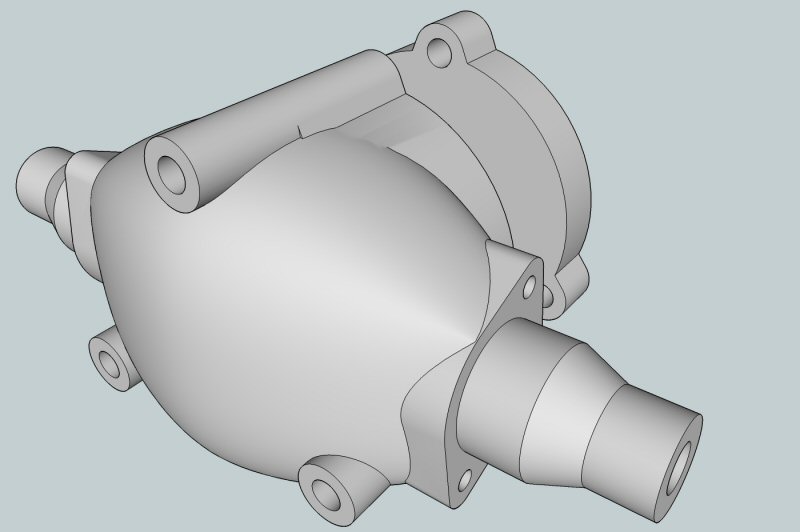 |
Front Cast Housing ( 1 required)The front cast housing sits at the very front of the cam shaft. I used the the aluminium tube supplied with the GTM dummy engine kit. The tube is 19mm diameter.
You may want to alter these proportions for your model.
For best results print the parts as set out in the STL files for minimum "peel" effect.
|
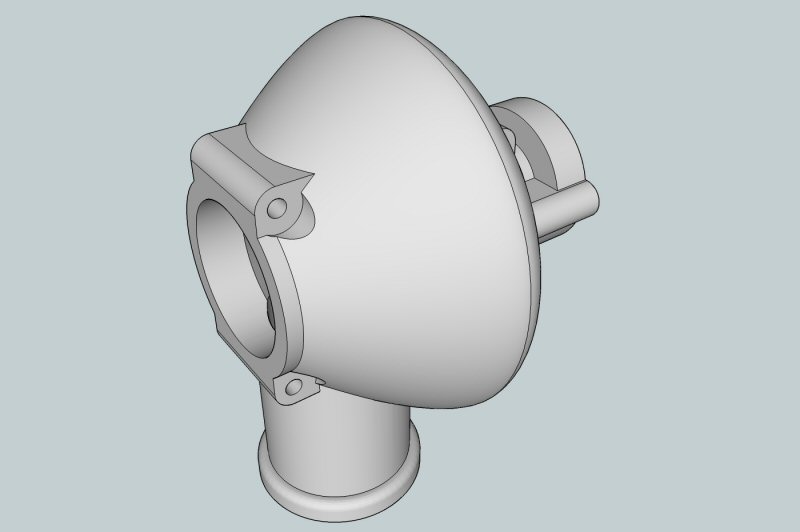 |
Rear Cast Housing ( 1 required)The rear cast housing sits at the very back of the cam shaft. I used the the aluminium tube supplied with the GTM dummy engine kit. The tube is 19mm diameter.
You may want to alter these proportions for your model.
For best results print the parts as set out in the STL files for minimum "peel" effect.
|
|
Inlet Manifold ( 2 sets required)The rear cast housing sits at the very back of the cam shaft. I used the the aluminium tube supplied with the GTM dummy engine kit. The tube is 19mm diameter.
On my engine the engine cylinders were separated 600mm apart.
You may want to alter these proportions for your model.
For best results print the parts as set out in the STL files for minimum "peel" effect.
|
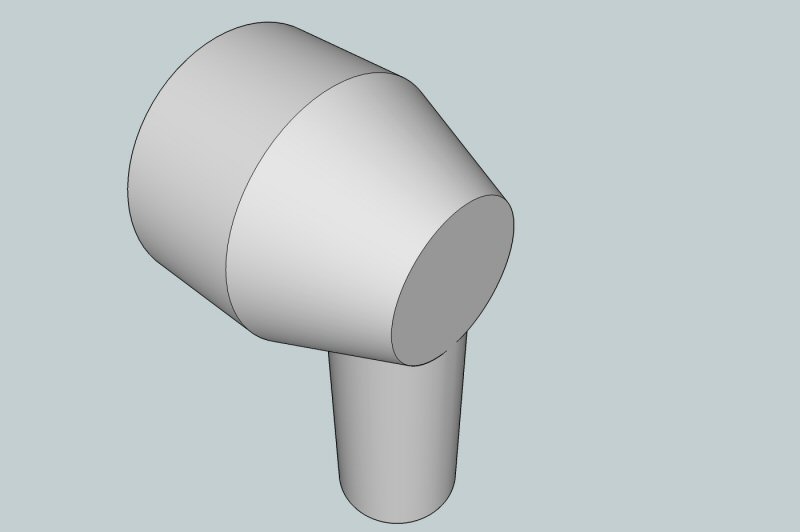 |
Cylinder 6 pipe ( 1 required)At the back of cylinder 6 there is a small manifold for a pipe to connect into the cylinder. Mount this part to offer a connection for your tube.
You may want to alter these proportions for your model.
For best results print the parts as set out in the STL files for minimum "peel" effect.
|
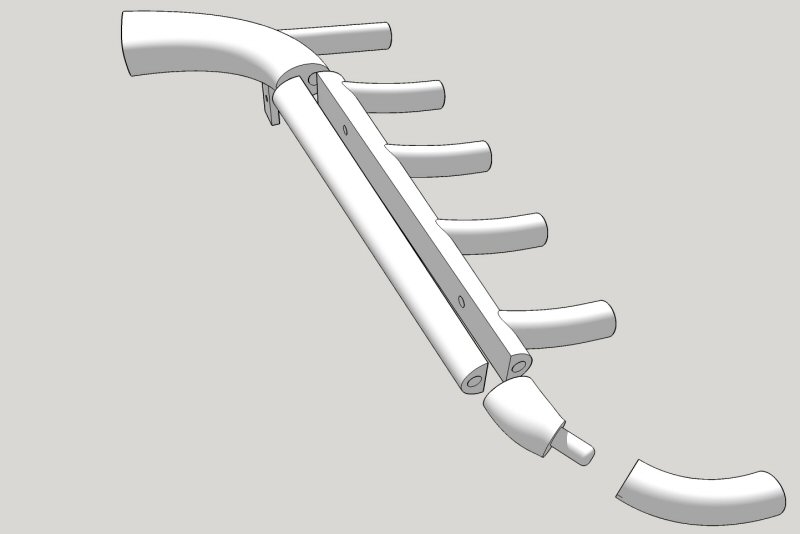 |
Exhaust ( 1 required)This exhaust is a common trumpet design seen on many mid to late D.VII's The exhaust is supplied in 5 parts to make printing more effective and stronger. You need to use ABS or ColorFab XT type materials for strength, Stereolithography (SLA) using light sensitive resins may also be unsuitable as they become brittle with age. If you have deep pockets print in metal why don't you!
The exhaust requires the cylinders to be separated at 60mm intervals for the model to work. Accuracy in the build is essential!
There are 2 trumpets, one with a mounting plate and one without. You choose!! For best results print the parts as set out in the STL files for minimum "peel" effect.
|
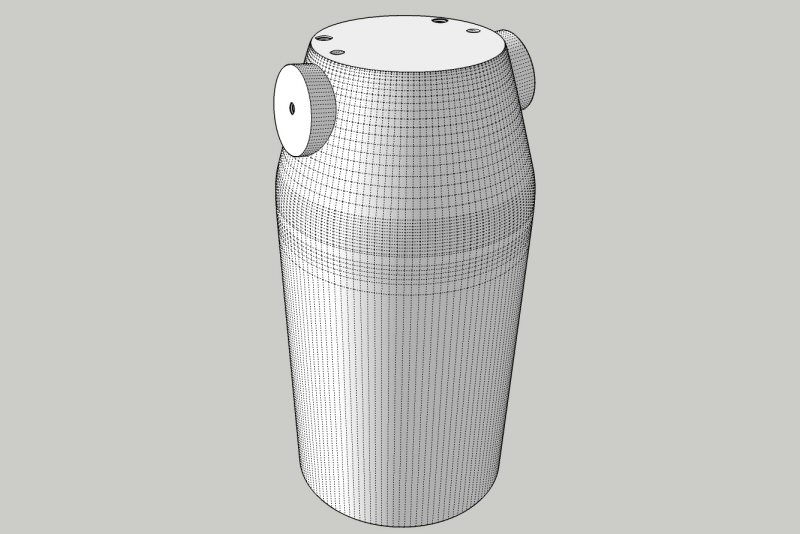 |
Cylinder (6 required)This is the cylinder shape. Use it to make a mold to cast the cylinders from. I did not use anything like the length used here for my cast parts so make it as deep as you like.
I have left the manifolds in position, so you get the correct angle for the exhaust.
The manifild with the larger hole is for the exhaust.
Print is anything you want but some clean up will be required before making the silicone mold!
The cylinders were separated at 60mm intervals for my dummy engine. Accuracy in the build is essential!
|